Django-Dashing을 활용하면 쉽게 대시보드 웹페이지 생성이 가능합니다.
아래 링크를 통해서 기본적인 대시보드 생성이 가능합니다.
2017/01/24 - [Programming/Python] - Django-dashing으로 대시보드 웹페이지 생성
기본적인 대시보드는 커스텀이 불가능합니다.
원하는 대시보드 형태로 커스터마이징을 하려면 몇 가지 작업이 추가로 필요합니다.
1. 새로운 대시보드 생성
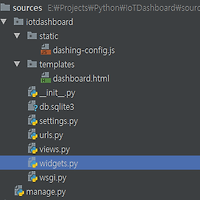
먼저 __init__.py 파일이 위치한 곳에 'static' 디렉토리를 생성합니다.
디렉토리를 생성하고 dashing-config.js 파일을 생성합니다.

파일 내용은 아래와 같이 작성합니다.
/* global $, Dashboard */

var dashboard = new Dashboard();

dashboard.addWidget('clock_widget', 'Clock');

dashboard.addWidget('clock_widget2', 'Clock');

dashboard.addWidget('current_valuation_widget', 'Number', {
    getData: function () {
        $.extend(this.scope, {
            title: 'Current Valuation',
            moreInfo: 'In billions',
            updatedAt: 'Last updated at 14:10',
            detail: '64%',
            value: '$35'
        });
    }
});

dashboard.addWidget('buzzwords_widget', 'List', {
    getData: function () {
        $.extend(this.scope, {
            title: 'Buzzwords',
            moreInfo: '# of times said around the office',
            updatedAt: 'Last updated at 18:58',
            data: [{label: 'Exit strategy', value: 24},
                   {label: 'Web 2.0', value: 12},
                   {label: 'Turn-key', value: 2},
                   {label: 'Enterprise', value: 12},
                   {label: 'Pivoting', value: 3},
                   {label: 'Leverage', value: 10},
                   {label: 'Streamlininess', value: 4},
                   {label: 'Paradigm shift', value: 6},
                   {label: 'Synergy', value: 7}]
        });
    }
});

dashboard.addWidget('convergence_widget', 'Graph', {
    getData: function () {
        $.extend(this.scope, {
            title: 'Convergence',
            value: '41',
            moreInfo: '',
            data: [
                    { x: 0, y: 40 },
                    { x: 1, y: 49 },
                    { x: 2, y: 38 },
                    { x: 3, y: 30 },
                    { x: 4, y: 32 }
                ]
            });
    }
});
먼저 var dashboard = new Dashboard();를 호출해서 새로운 대시보드를 생성합니다.
이후에는 addWidget()을 통해 원하는 위젯을 추가하면 됩니다.
기존에 실행중인 상태면 Ctrl + C로 종료한 이후에 다시 시작합니다.
python manage.py runserver
다음과 같이 시계가 2개가 추가된 대시보드가 표시되면 정상입니다.

원하는 형태로 위젯을 추가해서 대시보드를 만들 수 있습니다.
2. 템플릿 파일 추가
템플릿 html 파일을 추가해서 dash-config.js 파일을 불러서 사용할 수 있습니다.
먼저 static 디렉토리와 동일한 위치에 templates 디렉토리를 생성합니다.
그리고 dashboard.html 파일을 생성하고 다음 내용을 입력합니다.
{% extends 'dashing/base.html' %}
{% load staticfiles %}

<html>
    <head>
        <title>{% block title %}Home IoT Dashboard{% endblock %}</title>
    </head>
</html>

{% block config_file %}
<script type="text/javascript" src="{% static 'dashing-config.js' %}"></script>
{% endblock %}
타이틀을 별도로 지정했고 dashing-config.js를 직접 불러오는 것을 확인할 수 있습니다.
해당 템플릿 파일을 사용하기 위해 settings.py 파일을 수정합니다.
파일의 TEMPLATES 부분의 DIRS 안에 디렉토리를 추가합니다.
TEMPLATES = [
    {
        'BACKEND': 'django.template.backends.django.DjangoTemplates',
        'DIRS': [os.path.join(BASE_DIR + 'templates/'), ],
        'APP_DIRS': True,
        'OPTIONS': {
            'context_processors': [
                'django.template.context_processors.debug',
                'django.template.context_processors.request',
                'django.contrib.auth.context_processors.auth',
                'django.contrib.messages.context_processors.messages',
            ],
        },
    },
]
그리고 INSTALLED_APPS의 마지막 부분에 장고 프로젝트 이름을 입력합니다.
INSTALLED_APPS = [
    'django.contrib.admin',
    'django.contrib.auth',
    'django.contrib.contenttypes',
    'django.contrib.sessions',
    'django.contrib.messages',
    'django.contrib.staticfiles',
    'dashing',
    'iotdashboard',
]
다음과 같은 내용으로 view.py 파일을 __init__.py 파일과 동일한 위치에 생성합니다.
from dashing.views import Dashboard

class CustomDashboard(Dashboard):
    template_name = 'dashboard.html'
다음으로 url.py 파일을 다음과 같이 변경합니다.
from django.conf.urls import include, url
from django.contrib import admin

from dashing.utils import router
from django.views.generic.base import RedirectView

from .view import CustomDashboard

urlpatterns = [
    url(r'^admin/', admin.site.urls),
    url(r'^dashboard/', CustomDashboard.as_view()),
    url(r'^$', RedirectView.as_view(url='dashboard/'), name='index')
]
서비스를 다시 시작하면 다음과 같이 템플릿 파일에 지정한 타이틀이 반영된 웹페이지가 표시됩니다.

HTML 태그에 지정된 타이틀이 정상적으로 표시되면 커스텀 대시보드가 완성됩니다.
원하는 위젯을 추가하고 싶으면 addWidget()으로 추가할 수 있습니다.
필요한 위젯을 추가하고 대시보드를 원하는 형태로 작성하면 됩니다.
'Programming > Python' 카테고리의 다른 글
| 파이썬 정규표현식으로 쉼표(콤마, Comma)가 있는 숫자 찾기 (0) | 2018.09.14 |
|---|---|
| 3. Django-dashing에 커스텀 위젯 추가 (0) | 2017.02.06 |
| 1. Django-dashing으로 IoT 대시보드 생성 (2) | 2017.01.24 |
| 파이썬 가변인자 함수 사용 (0) | 2016.12.28 |
| 파이썬 데이터 깊은 복사(Deep Copy)와 얕은 복사(Swallow Copy) (0) | 2016.12.27 |