rclone은 다양한 클라우드 스토리지를 연동해서 사용할 수 있게 해 줍니다.

구글 드라이브(Google Drive), 원드라이브(OneDrive), 드롭박스(Dropbox) 등 유명 클라우드 스토리지를 지원합니다.
rclone을 통해 클라우드 스토리지를 연동하면 로컬 디렉토리처럼 접근이 가능합니다.
특히 무제한 구글 드라이브를 연동하면 무제한의 공간을 활용하는 것이 가능합니다.
또한 암호화를 지원하기 때문에 암호화된 파일명과 디렉토리명은 물론이고 내용도 암호화해서 보관할 수 있습니다.
암호화를 하지 않고 구글 드라이브를 연동하는 방법은 아래 링크를 참조하면 됩니다.
2022.02.08 - [IT/NAS] - [자작NAS] 우분투 서버에 Docker로 rclone 설치 및 구글 드라이브 연동
[자작NAS] 우분투 서버에 Docker로 rclone 설치 및 구글 드라이브 연동
rclone은 클라우드 스토리지 서비스를 연동하기 위한 툴입니다. 구글 드라이브, 원드라이브, 드롭박스 등의 다양한 클라우드 스토리지 서비스를 지원합니다. 사이트에서 대부분의 스토리지 서비
psychoria.tistory.com
우분투 서버에 Docker를 통해 rclone을 설치하고 구글 드라이브를 암호화 연동하는 방법을 알아보겠습니다.
1. Docker 컨테이너 생성
먼저 rclone을 통해 구글 드라이브를 암호화해서 연결하는 경우 기존 암호화되지 않은 데이터는 읽지 못합니다.
그렇기 때문에 rclone 연동 이후에 모든 데이터를 새로 rclone을 통해 올려야 합니다.
기존에 암호화되지 않은 데이터를 그대로 사용하고 싶으면 암호화없이 구글 드라이브를 연동해야 합니다.
여기서는 암호화해서 구글 드라이브를 연동하는 방법을 설명합니다.
먼저 아래 명령어로 rclone에 필요한 디렉토리들을 생성합니다.
sudo mkdir -p /data/rclone_gdrive/config
sudo mkdir -p /data/rclone_gdrive/log
sudo mkdir -p /data/rclone_gdrive/cache

sudo mkdir -p /data/rclone_gdrive/mergerfs
sudo chmod -R 777 /data/rclone_gdrive/mergerfs

sudo mkdir -p /mnt/rclone_gdrive
처음 세 줄은 설정과 로그, 캐시 등을 저장하는 공간입니다.
그리고 mergerfs를 연동하기 위해 그 다음의 두 줄을 실행하면 됩니다.
마지막으로 구글 드라이브를 디렉토리에 연동하기 위한 디렉토리를 생성합니다.
mergerfs를 연동하면 해당 디렉토리에 있는 데이터를 구글 드라이브에 자동으로 업로드할 수 있습니다.
이제 다음 명령어로 컨테이너를 실행합니다.
sudo docker run -d \
--name=rclone_gdrive \
--net=bridge \
-v /data/rclone_gdrive/config:/config \
-v /data/rclone_gdrive/log:/log \
-v /data/rclone_gdrive/cache:/cache \
-v /mnt/rclone_gdrive:/data:shared \
-v /data/rclone_gdrive/mergerfs:/local \
--privileged=true \
--device /dev/fuse \
--cap-add=MKNOD \
--cap-add=SYS_ADMIN \
-e PGID=$(id -g $USER) \
-e PUID=$UID \
-e TZ=Asia/Seoul \
-e RCLONE_REMOTE_PATH=gdrive_crypt: \
-e RCLONE_MOUNT_USER_OPTS="--allow-non-empty --fast-list --drive-skip-gdocs --poll-interval=15s \
--vfs-cache-mode full --vfs-write-back 5s --bwlimit-file 16M --buffer-size=16M --vfs-read-chunk-size=32M \
--vfs-read-chunk-size-limit 2048M --vfs-cache-max-size 24G --vfs-cache-max-age 336h --vfs-read-ahead 32M \
--dir-cache-time=1000h --timeout 1h" \
-e MFS_USER_OPTS="rw,async_read=false,use_ino,allow_other,nonempty,func.getattr=newest,\
category.action=all,category.create=ff,cache.files=partial,dropcacheonclose=true" \
-e MOVE_LOCAL_ALL=true \
-e KEEP_EMPTY_DIRS=1 \
-e MOVE_LOCAL_SCHEDULE="0 * * * *" \
-e DATE_FORMAT="--iso-8601=seconds" \
-e POOLING_FS=mergerfs \
--restart=unless-stopped \
wiserain/rclone
환경 설정들은 다음과 같습니다.
| MOVE_LOCAL_ALL | 로컬 디렉토리의 파일을 구글 드라이브로 전부 이동 |
| KEEP_EMPTY_DIRS | 로컬 디렉토리의 파일을 전부 이동한 후에도 로컬에 빈 디렉토리를 유지 |
| MOVE_LOCAL_SCHEDULE | 로컬 디렉토리의 파일을 구글 드라이브로 이동하는 작업 스케줄 적용 (여기서는 매 정각마다 실행) |
여기서는 컨테이너의 /local에 /data/rclone_gdrive/mergerfs를 연결했습니다.
이제 mergerfs 디렉터리에 파일을 복사하면 매 정각에 모든 파일을 구글 드라이브로 이동합니다.
로컬 디렉토리에 파일을 옮겨두면 지정된 스케줄에 따라 파일이 자동으로 전송되기 때문에 편리합니다.
일정 날짜 이후의 파일만 옮기려면 MOVE_LOCAL_ALL 대신 MOVE_LOCAL_AFTER_DAYS를 추가하면 됩니다.
컨테이너가 동작하면 아래 명령어를 실행합니다.
sudo docker exec -it rclone_gdrive rclone_setup구글 드라이브를 연동하기 위해 몇 가지 사항을 입력해야 합니다.
2. 암호화/복호화 연동
다음과 같은 메뉴가 표시됩니다.
No remotes found - make a new one
n) New remote
s) Set configuration password
q) Quit config
n/s/q>
새로운 연결을 만들기 위해서 n을 입력합니다.

다음으로 이름을 입력하면 됩니다.
name>
컨테이너 생성 시 RCLONE_REMOTE_PATH에 입력한 값에서 콜론(:)을 빼고 입력하면 됩니다.
여기서는 gdrive_crypt를 입력했습니다.
다음으로 연동할 클라우드 스토리지 서비스를 선택합니다.
Option Storage.
Type of storage to configure.
Enter a string value. Press Enter for the default ("").
Choose a number from below, or type in your own value.
 1 / 1Fichier
   \ "fichier"
 2 / Alias for an existing remote
   \ "alias"
 3 / Amazon Drive
   \ "amazon cloud drive"
 4 / Amazon S3 Compliant Storage Providers including AWS, Alibaba, Ceph, Digital Ocean, Dreamhost, IBM COS, Minio, SeaweedFS, and Tencent COS
   \ "s3"
 5 / Backblaze B2
   \ "b2"
 6 / Better checksums for other remotes
   \ "hasher"
 7 / Box
   \ "box"
 8 / Cache a remote
   \ "cache"
 9 / Citrix Sharefile
   \ "sharefile"
10 / Compress a remote
   \ "compress"
11 / Dropbox
   \ "dropbox"
12 / Encrypt/Decrypt a remote
   \ "crypt"
13 / Enterprise File Fabric
   \ "filefabric"
14 / FTP Connection
   \ "ftp"
15 / Google Cloud Storage (this is not Google Drive)
   \ "google cloud storage"
16 / Google Drive
   \ "drive"
17 / Google Photos
   \ "google photos"
18 / Hadoop distributed file system
   \ "hdfs"
19 / Hubic
   \ "hubic"
20 / In memory object storage system.
   \ "memory"
21 / Jottacloud
   \ "jottacloud"
22 / Koofr
   \ "koofr"
23 / Local Disk
   \ "local"
24 / Mail.ru Cloud
   \ "mailru"
25 / Mega
   \ "mega"
26 / Microsoft Azure Blob Storage
   \ "azureblob"
27 / Microsoft OneDrive
   \ "onedrive"
28 / OpenDrive
   \ "opendrive"
29 / OpenStack Swift (Rackspace Cloud Files, Memset Memstore, OVH)
   \ "swift"
30 / Pcloud
   \ "pcloud"
31 / Put.io
   \ "putio"
32 / QingCloud Object Storage
   \ "qingstor"
33 / SSH/SFTP Connection
   \ "sftp"
34 / Sia Decentralized Cloud
   \ "sia"
35 / Sugarsync
   \ "sugarsync"
36 / Tardigrade Decentralized Cloud Storage
   \ "tardigrade"
37 / Transparently chunk/split large files
   \ "chunker"
38 / Union merges the contents of several upstream fs
   \ "union"
39 / Uptobox
   \ "uptobox"
40 / Webdav
   \ "webdav"
41 / Yandex Disk
   \ "yandex"
42 / Zoho
   \ "zoho"
43 / http Connection
   \ "http"
44 / premiumize.me
   \ "premiumizeme"
45 / seafile
   \ "seafile"
Storage>
여기서는 먼저 암호화/복호화 처리를 위해 crypt를 입력합니다.

다음으로 이후에 만들 구글 드라이브 연동 시 사용할 이름을 지정합니다.
Option remote.
Remote to encrypt/decrypt.
Normally should contain a ':' and a path, e.g. "myremote:path/to/dir",
"myremote:bucket" or maybe "myremote:" (not recommended).
Enter a string value. Press Enter for the default ("").
remote>
여기에 gdrive: (콜론 포함)을 입력합니다.
여기서 입력한 이름은 이후에 실제 구글 드라이브를 연동할 때 사용되기 때문에 기억해둬야 합니다.

다음으로 파일 이름을 암호화할 것인지 여부를 선택합니다.
Option filename_encryption.
How to encrypt the filenames.
Enter a string value. Press Enter for the default ("standard").
Choose a number from below, or type in your own value.
   / Encrypt the filenames.
 1 | See the docs for the details.
   \ "standard"
 2 / Very simple filename obfuscation.
   \ "obfuscate"
   / Don't encrypt the file names.
 3 | Adds a ".bin" extension only.
   \ "off"
filename_encryption>
파일 이름도 암호화를 하기 위해 standard를 입력합니다.

다음으로 디렉토리 이름을 암호화할 것인지 선택합니다.
Option directory_name_encryption.
Option to either encrypt directory names or leave them intact.
NB If filename_encryption is "off" then this option will do nothing.
Enter a boolean value (true or false). Press Enter for the default ("true").
Choose a number from below, or type in your own value.
 1 / Encrypt directory names.
   \ "true"
 2 / Don't encrypt directory names, leave them intact.
   \ "false"
directory_name_encryption>
디렉토리 이름도 암호화를 하려면 true를 입력하면 됩니다.

다음으로 암호화에 사용할 패스워드를 설정합니다.
Option password.
Password or pass phrase for encryption.
Choose an alternative below.
y) Yes type in my own password
g) Generate random password
y/g>
패스워드를 직접 입력하기 위해 y를 입력합니다.

이제 원하는 비밀번호를 동일하게 두 번 입력하면 됩니다.
Enter the password:
password:
Confirm the password:
password:
다음으로 암호화를 위한 솔트를 사용할지 여부를 선택합니다.
솔트는 암호를 해독하기 어렵게 만들기 위해서 추가로 사용하는 값입니다.
Option password2.
Password or pass phrase for salt.
Optional but recommended.
Should be different to the previous password.
Choose an alternative below. Press Enter for the default (n).
y) Yes type in my own password
g) Generate random password
n) No leave this optional password blank (default)
y/g/n>
여기도 직접 원하는 솔트 값을 사용하기 위해 y를 입력합니다.

만약 솔트를 사용하지 않을 것이라면 입력하지 않고 그냥 엔터를 입력합니다.
y를 선택했으면 비밀번호 입력과 동일하게 같은 값을 두 번 입력해줍니다.
Enter the password:
password:
Confirm the password:
password:
비밀번호와 솔트는 반드시 기억해둬야 새 서버에 rclone 설치 시 동일하게 입력해서 구글 드라이브를 연동할 수 있습니다.
다음으로 상세 설정을 수정할 것인가를 물어봅니다.
Edit advanced config?
y) Yes
n) No (default)
y/n>
여기서는 n을 눌러서 스킵하면 됩니다.

지금까지 입력했던 내용들을 확인할 수 있습니다.
이름은 gdrive_crypt으로 설정했고 crypt 타입으로 이후에 생성할 gdrive라는 이름의 연결을 암호화합니다.
remote로 설정된 gdrive라는 이름은 이후에 구글 드라이브 연동 시 동일하게 입력해야 합니다.
마지막으로 확인을 하고 y를 입력해서 설정을 적용합니다.
y) Yes this is OK (default)
e) Edit this remote
d) Delete this remote
y/e/d>
이것으로 암호화/복호화 연동이 완료됩니다.
3. 구글 드라이브 연동
암호화를 위한 연동을 마치고 구글 드라이브 연동을 계속할 수 있습니다.
e) Edit existing remote
n) New remote
d) Delete remote
r) Rename remote
c) Copy remote
s) Set configuration password
q) Quit config
e/n/d/r/c/s/q>
처음보다 메뉴가 늘어났지만 동일하게 n을 입력합니다.

다음으로 이름을 입력하는데 위에서 입력했던 gdrive를 입력(gdrive:에서 :제거)해주면 됩니다.
name>
다음으로 연동할 클라우드 스토리지 서비스를 선택합니다.
Option Storage.
Type of storage to configure.
Enter a string value. Press Enter for the default ("").
Choose a number from below, or type in your own value.
 1 / 1Fichier
   \ "fichier"
 2 / Alias for an existing remote
   \ "alias"
 3 / Amazon Drive
   \ "amazon cloud drive"
 4 / Amazon S3 Compliant Storage Providers including AWS, Alibaba, Ceph, Digital Ocean, Dreamhost, IBM COS, Minio, SeaweedFS, and Tencent COS
   \ "s3"
 5 / Backblaze B2
   \ "b2"
 6 / Better checksums for other remotes
   \ "hasher"
 7 / Box
   \ "box"
 8 / Cache a remote
   \ "cache"
 9 / Citrix Sharefile
   \ "sharefile"
10 / Compress a remote
   \ "compress"
11 / Dropbox
   \ "dropbox"
12 / Encrypt/Decrypt a remote
   \ "crypt"
13 / Enterprise File Fabric
   \ "filefabric"
14 / FTP Connection
   \ "ftp"
15 / Google Cloud Storage (this is not Google Drive)
   \ "google cloud storage"
16 / Google Drive
   \ "drive"
17 / Google Photos
   \ "google photos"
18 / Hadoop distributed file system
   \ "hdfs"
19 / Hubic
   \ "hubic"
20 / In memory object storage system.
   \ "memory"
21 / Jottacloud
   \ "jottacloud"
22 / Koofr
   \ "koofr"
23 / Local Disk
   \ "local"
24 / Mail.ru Cloud
   \ "mailru"
25 / Mega
   \ "mega"
26 / Microsoft Azure Blob Storage
   \ "azureblob"
27 / Microsoft OneDrive
   \ "onedrive"
28 / OpenDrive
   \ "opendrive"
29 / OpenStack Swift (Rackspace Cloud Files, Memset Memstore, OVH)
   \ "swift"
30 / Pcloud
   \ "pcloud"
31 / Put.io
   \ "putio"
32 / QingCloud Object Storage
   \ "qingstor"
33 / SSH/SFTP Connection
   \ "sftp"
34 / Sia Decentralized Cloud
   \ "sia"
35 / Sugarsync
   \ "sugarsync"
36 / Tardigrade Decentralized Cloud Storage
   \ "tardigrade"
37 / Transparently chunk/split large files
   \ "chunker"
38 / Union merges the contents of several upstream fs
   \ "union"
39 / Uptobox
   \ "uptobox"
40 / Webdav
   \ "webdav"
41 / Yandex Disk
   \ "yandex"
42 / Zoho
   \ "zoho"
43 / http Connection
   \ "http"
44 / premiumize.me
   \ "premiumizeme"
45 / seafile
   \ "seafile"
Storage>
여기서는 drive를 입력해서 구글 드라이브를 연동합니다.

다음으로 클라이언트 ID를 입력해야 합니다.
Option client_id.
Google Application Client Id
Setting your own is recommended.
See https://rclone.org/drive/#making-your-own-client-id for how to create your own.
If you leave this blank, it will use an internal key which is low performance.
Enter a string value. Press Enter for the default ("").
client_id>
구글 드라이브 연동을 위한 클라이언트 ID와 시크릿을 생성하기 위한 방법은 아래 링크를 참조하면 됩니다.
2019.01.11 - [IT/Tip&Tech] - 구글 드라이브 API(Google Drive API) 활성화 방법
구글 드라이브 API(Google Drive API) 활성화 방법
약간의 월 비용을 지불하고 G Suite 서비스를 사용하면 무제한 구글 드라이브 용량이 제공됩니다. 구글 드라이브 무제한을 활용해서 PLEX와 연동시켜서 사용할 수 있습니다. Plexdrive는 구글 드라이
psychoria.tistory.com
클라이언트 ID를 복사해서 입력합니다.

보통 .apps.googleusercontent.com 형태로 끝나는 값으로 이것을 입력하면 됩니다.

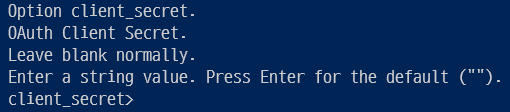
다음으로 Secret을 입력하면 됩니다.
Option client_secret.
OAuth Client Secret.
Leave blank normally.
Enter a string value. Press Enter for the default ("").
client_secret>
이 값은 Client ID 값 옆의 연필 모양 아이콘(Edit OAuth client)을 누르면 볼 수 있습니다.

공백 등이 포함되지 않도록 주의해서 값을 복사한 후 입력하면 됩니다.
다음으로 모든 파일을 접근할 수 있는 권한을 설정합니다.
Option scope.
Scope that rclone should use when requesting access from drive.
Enter a string value. Press Enter for the default ("").
Choose a number from below, or type in your own value.
 1 / Full access all files, excluding Application Data Folder.
   \ "drive"
 2 / Read-only access to file metadata and file contents.
   \ "drive.readonly"
   / Access to files created by rclone only.
 3 | These are visible in the drive website.
   | File authorization is revoked when the user deauthorizes the app.
   \ "drive.file"
   / Allows read and write access to the Application Data folder.
 4 | This is not visible in the drive website.
   \ "drive.appfolder"
   / Allows read-only access to file metadata but
 5 | does not allow any access to read or download file content.
   \ "drive.metadata.readonly"
scope>
모든 파일에 대해서 접근 권한을 얻기 위해 drive를 입력합니다.

다음은 루트 폴더를 설정하는 설정으로 그냥 엔터를 누르면 구글 드라이브의 루트를 사용합니다.
Option root_folder_id.
ID of the root folder.
Leave blank normally.
Fill in to access "Computers" folders (see docs), or for rclone to use
a non root folder as its starting point.
Enter a string value. Press Enter for the default ("").
root_folder_id>
아무것도 입력하지 않고 엔터를 입력하면 됩니다.
다음은 Service Account Credentials JSON 경로 설정입니다.
Option service_account_file.
Service Account Credentials JSON file path.
Leave blank normally.
Needed only if you want use SA instead of interactive login.
Leading `~` will be expanded in the file name as will environment variables such as `${RCLONE_CONFIG_DIR}`.
Enter a string value. Press Enter for the default ("").
service_account_file>
이 부분은 아무 입력없이 바로 엔터를 입력해서 넘어가면 됩니다.

마지막으로 상세 설정을 수정할 것인지 물어봅니다.
Edit advanced config?
y) Yes
n) No (default)
y/n>
여기서는 n을 눌러서 다음으로 진행하면 됩니다.

자동 설정을 사용할 것인지 설정합니다.
Use auto config?
 * Say Y if not sure
 * Say N if you are working on a remote or headless machine

y) Yes (default)
n) No
y/n>
일반적으로 서버에 SSH 연결을 한 후 설정하기 때문에 여기서는 n을 눌러서 진행합니다.

여기서 링크가 하나 표시되는데 이 링크를 웹 브라우저에서 열어줍니다.
Option config_verification_code.
Verification code
Go to this URL, authenticate then paste the code here.
https://accounts.google.com/o/oauth2/auth
Enter a string value. Press Enter for the default ("").
config_verification_code>
웹 브라우저에서 로그인을 하고 연결을 허용하기 위해 Allow를 클릭합니다.

화면에 코드가 표시되는데 이 코드를 입력해주면 됩니다.

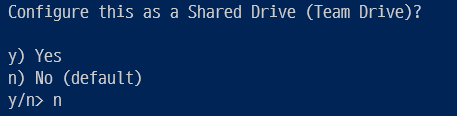
다음으로 팀 드라이브를 설정할 것인지 물어봅니다.
Configure this as a Shared Drive (Team Drive)?

y) Yes
n) No (default)
y/n>
개인 드라이브를 사용하기 위해 n을 입력합니다.
마지막으로 설정을 확인하고 제대로 입력이 되었으면 y를 눌러서 저장합니다.
y) Yes this is OK (default)
e) Edit this remote
d) Delete this remote
y/e/d>
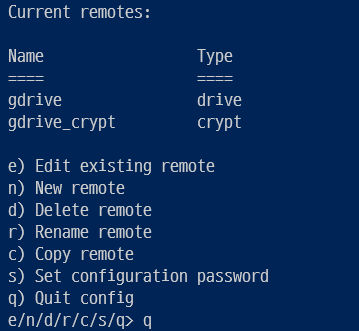
마지막으로 추가된 리모트들을 확인할 수 있습니다.
Current remotes:

Name                 Type
====                 ====
gdrive               drive
gdrive_crypt         crypt

e) Edit existing remote
n) New remote
d) Delete remote
r) Rename remote
c) Copy remote
s) Set configuration password
q) Quit config
e/n/d/r/c/s/q>
설정을 확인하고 q를 눌러서 종료합니다.
이것으로 설정이 완료됩니다.
4. 드라이브 연동 확인
설정이 정상적으로 되면 /mnt/rclone_gdrive/ 이동하면 구글 드라이브의 파일을 볼 수 있습니다.
cd /mnt/rclone_gdrive/처음 연동을 했을 때는 아무런 파일이 표시되지 않습니다.
mkdir 등으로 디렉토리를 만들어보면 리눅스에서는 암호화가 안된 디렉토리 명으로 볼 수 있습니다.
구글 드라이브에서는 디렉토리 및 파일 암호화 설정 여부에 따라 암호화된 이름으로 표시가 됩니다.
다음으로 /data/rclone_gdrive/mergerfs에 디렉토리와 파일들을 추가합니다.
스케줄러가 매 정각에 파일들을 구글드라이브로 전송하고 파일을 자동으로 삭제합니다.
이것으로 rclone으로 구글 드라이브 암호화 연동이 완료됩니다.
'IT > NAS' 카테고리의 다른 글
| [자작NAS] 우분투 서버에 Docker로 PostgreSQL 설치 (0) | 2022.02.14 |
|---|---|
| [자작NAS] 우분투 서버에 Docker로 rclone 설치 및 구글 드라이브 연동 (0) | 2022.02.08 |
| [자작NAS] 우분투 서버에 Docker로 Snapdrop 설치 (0) | 2021.05.11 |
| [자작NAS] 우분투 서버에 Docker로 Snipe-IT 설치 (4) | 2020.08.17 |
| [자작NAS] 우분투 서버에 Docker로 WireGuard 설치 (0) | 2020.07.31 |


