rclone은 클라우드 스토리지 서비스를 연동하기 위한 툴입니다.

구글 드라이브, 원드라이브, 드롭박스 등의 다양한 클라우드 스토리지 서비스를 지원합니다.
사이트에서 대부분의 스토리지 서비스 연동을 지원하는 것을 확인할 수 있습니다.
우분투 서버에서 Docker를 통해 구글 드라이브 암호화 연동은 아래 링크에서 확인 가능합니다.
2021.12.14 - [IT/NAS] - [자작NAS] 우분투 서버에 Docker로 rclone 설치 및 구글 드라이브 암호화 연동
[자작NAS] 우분투 서버에 Docker로 rclone 설치 및 구글 드라이브 암호화 연동
rclone은 다양한 클라우드 스토리지를 연동해서 사용할 수 있게 해 줍니다. 구글 드라이브(Google Drive), 원드라이브(OneDrive), 드롭박스(Dropbox) 등 유명 클라우드 스토리지를 지원합니다. rclone을 통해
psychoria.tistory.com
여기서는 암호화하지 않고 구글 드라이브를 연동하는 방법을 알아보겠습니다.
1. Docker 컨테이너 생성
암호화 없이 구글 드라이브를 연동하는 경우 기존에 업로드했던 파일들을 그대로 사용할 수 있는 장점이 있습니다.
아래 명령어로 필요한 디렉토리를 생성합니다.
sudo mkdir -p /data/rclone_gdrive/config
sudo mkdir -p /data/rclone_gdrive/log
sudo mkdir -p /data/rclone_gdrive/cache

sudo mkdir -p /data/rclone_gdrive/mergerfs
sudo chmod -R 777 /data/rclone_gdrive/mergerfs

sudo mkdir -p /mnt/rclone_gdrive
먼저 설정이나 캐시 등을 저장할 공간을 생성합니다.
mergerfs는 로컬 디렉토리와 구글 드라이브 디렉토리를 합쳐서 보여주는 역할을 합니다.
그리고 연동을 마친 후 mergerfs에 파일을 옮겨두면 자동으로 구글 드라이브에 업로드가 됩니다.
아래 명령어로 rclone 컨테이너를 실행합니다.
sudo docker run -d \
--name=rclone_gdrive \
--net=bridge \
-v /data/rclone_gdrive/config:/config \
-v /data/rclone_gdrive/log:/log \
-v /data/rclone_gdrive/cache:/cache \
-v /mnt/rclone_gdrive:/data:shared \
-v /data/rclone_gdrive/mergerfs:/local \
--privileged=true \
--device /dev/fuse \
--cap-add=MKNOD \
--cap-add=SYS_ADMIN \
-e PGID=$(id -g $USER) \
-e PUID=$UID \
-e TZ=Asia/Seoul \
-e RCLONE_REMOTE_PATH=gdrive: \
-e RCLONE_MOUNT_USER_OPTS="--allow-non-empty --fast-list --drive-skip-gdocs --poll-interval=15s \
--vfs-cache-mode full --vfs-write-back 5s --bwlimit-file 16M --buffer-size=16M --vfs-read-chunk-size=32M \
--vfs-read-chunk-size-limit 2048M --vfs-cache-max-size 24G --vfs-cache-max-age 336h --vfs-read-ahead 32M \
--dir-cache-time=1000h --timeout 1h" \
-e MFS_USER_OPTS="rw,async_read=false,use_ino,allow_other,nonempty,func.getattr=newest,\
category.action=all,category.create=ff,cache.files=partial,dropcacheonclose=true" \
-e MOVE_LOCAL_ALL=true \
-e KEEP_EMPTY_DIRS=1 \
-e MOVE_LOCAL_SCHEDULE="0 * * * *" \
-e DATE_FORMAT="--iso-8601=seconds" \
-e POOLING_FS=mergerfs \
--restart=unless-stopped \
wiserain/rclone
환경 설정에 추가된 몇 가지 옵션에 대한 설명은 다음과 같습니다.
| MOVE_LOCAL_ALL | 로컬 디렉토리의 파일을 구글 드라이브로 전부 이동 |
| KEEP_EMPTY_DIRS | 로컬 디렉토리의 파일을 전부 이동한 후에도 로컬에 빈 디렉토리를 유지 |
| MOVE_LOCAL_SCHEDULE | 로컬 디렉토리의 파일을 구글 드라이브로 이동하는 작업 스케줄 적용 (여기서는 매 정각마다 실행) |
설정에 따라 로컬 디렉토리(mergerfs)에 파일을 복사하면 1시간마다 구글 드라이브에 업로드됩니다.
스케줄을 변경하고 싶으면 MOVE_LOCAL_SCHEDULE의 값을 변경하면 됩니다.
crontab 스케줄 작성은 아래 링크에서 가능합니다.
Crontab.guru - The cron schedule expression editor
컨테이너 동작 후 아래 명령어를 실행해서 몇 가지 설정을 진행합니다.
sudo docker exec -it rclone_gdrive rclone_setup다음으로 구글 드라이브 연동을 위한 설정을 진행합니다.
2. 구글 드라이브 연동
구글 드라이브 연동을 진행합니다.
No remotes found - make a new one
n) New remote
s) Set configuration password
q) Quit config
n/s/q>
새로운 연결을 생성하기 위해 n을 입력합니다.

다음으로 이름을 입력하는데 RCLONE_REMOTE_PATH의 값인 gdrive(gdrive:에서 : 제거)를 입력합니다.
name>
다음으로 클라우드 스토리지 서비스를 선택합니다.
Option Storage.
Type of storage to configure.
Enter a string value. Press Enter for the default ("").
Choose a number from below, or type in your own value.
 1 / 1Fichier
   \ "fichier"
 2 / Alias for an existing remote
   \ "alias"
 3 / Amazon Drive
   \ "amazon cloud drive"
 4 / Amazon S3 Compliant Storage Providers including AWS, Alibaba, Ceph, Digital Ocean, Dreamhost, IBM COS, Minio, SeaweedFS, and Tencent COS
   \ "s3"
 5 / Backblaze B2
   \ "b2"
 6 / Better checksums for other remotes
   \ "hasher"
 7 / Box
   \ "box"
 8 / Cache a remote
   \ "cache"
 9 / Citrix Sharefile
   \ "sharefile"
10 / Compress a remote
   \ "compress"
11 / Dropbox
   \ "dropbox"
12 / Encrypt/Decrypt a remote
   \ "crypt"
13 / Enterprise File Fabric
   \ "filefabric"
14 / FTP Connection
   \ "ftp"
15 / Google Cloud Storage (this is not Google Drive)
   \ "google cloud storage"
16 / Google Drive
   \ "drive"
17 / Google Photos
   \ "google photos"
18 / Hadoop distributed file system
   \ "hdfs"
19 / Hubic
   \ "hubic"
20 / In memory object storage system.
   \ "memory"
21 / Jottacloud
   \ "jottacloud"
22 / Koofr
   \ "koofr"
23 / Local Disk
   \ "local"
24 / Mail.ru Cloud
   \ "mailru"
25 / Mega
   \ "mega"
26 / Microsoft Azure Blob Storage
   \ "azureblob"
27 / Microsoft OneDrive
   \ "onedrive"
28 / OpenDrive
   \ "opendrive"
29 / OpenStack Swift (Rackspace Cloud Files, Memset Memstore, OVH)
   \ "swift"
30 / Pcloud
   \ "pcloud"
31 / Put.io
   \ "putio"
32 / QingCloud Object Storage
   \ "qingstor"
33 / SSH/SFTP Connection
   \ "sftp"
34 / Sia Decentralized Cloud
   \ "sia"
35 / Sugarsync
   \ "sugarsync"
36 / Tardigrade Decentralized Cloud Storage
   \ "tardigrade"
37 / Transparently chunk/split large files
   \ "chunker"
38 / Union merges the contents of several upstream fs
   \ "union"
39 / Uptobox
   \ "uptobox"
40 / Webdav
   \ "webdav"
41 / Yandex Disk
   \ "yandex"
42 / Zoho
   \ "zoho"
43 / http Connection
   \ "http"
44 / premiumize.me
   \ "premiumizeme"
45 / seafile
   \ "seafile"
Storage>
여기서는 drive를 입력해서 구글 드라이브를 선택합니다.

서비스가 추가될 때마다 번호가 바뀔 수 있기 때문에 숫자 대신 drive를 입력하는 것이 확실합니다.
다음은 클라이언트 ID를 입력하는 과정입니다.
Option client_id.
Google Application Client Id
Setting your own is recommended.
See https://rclone.org/drive/#making-your-own-client-id for how to create your own.
If you leave this blank, it will use an internal key which is low performance.
Enter a string value. Press Enter for the default ("").
client_id>
클라이언트 ID와 시크릿을 생성하는 방법은 다음과 같습니다.
2019.01.11 - [IT/Tip&Tech] - 구글 드라이브 API(Google Drive API) 활성화 방법
구글 드라이브 API(Google Drive API) 활성화 방법
약간의 월 비용을 지불하고 G Suite 서비스를 사용하면 무제한 구글 드라이브 용량이 제공됩니다. 구글 드라이브 무제한을 활용해서 PLEX와 연동시켜서 사용할 수 있습니다. Plexdrive는 구글 드라이
psychoria.tistory.com
방법이 조금 달라졌지만 참조해서 클라이언트 ID와 시크릿을 생성하면 됩니다.
생성된 클라이언트 ID를 복사한 후 입력합니다.
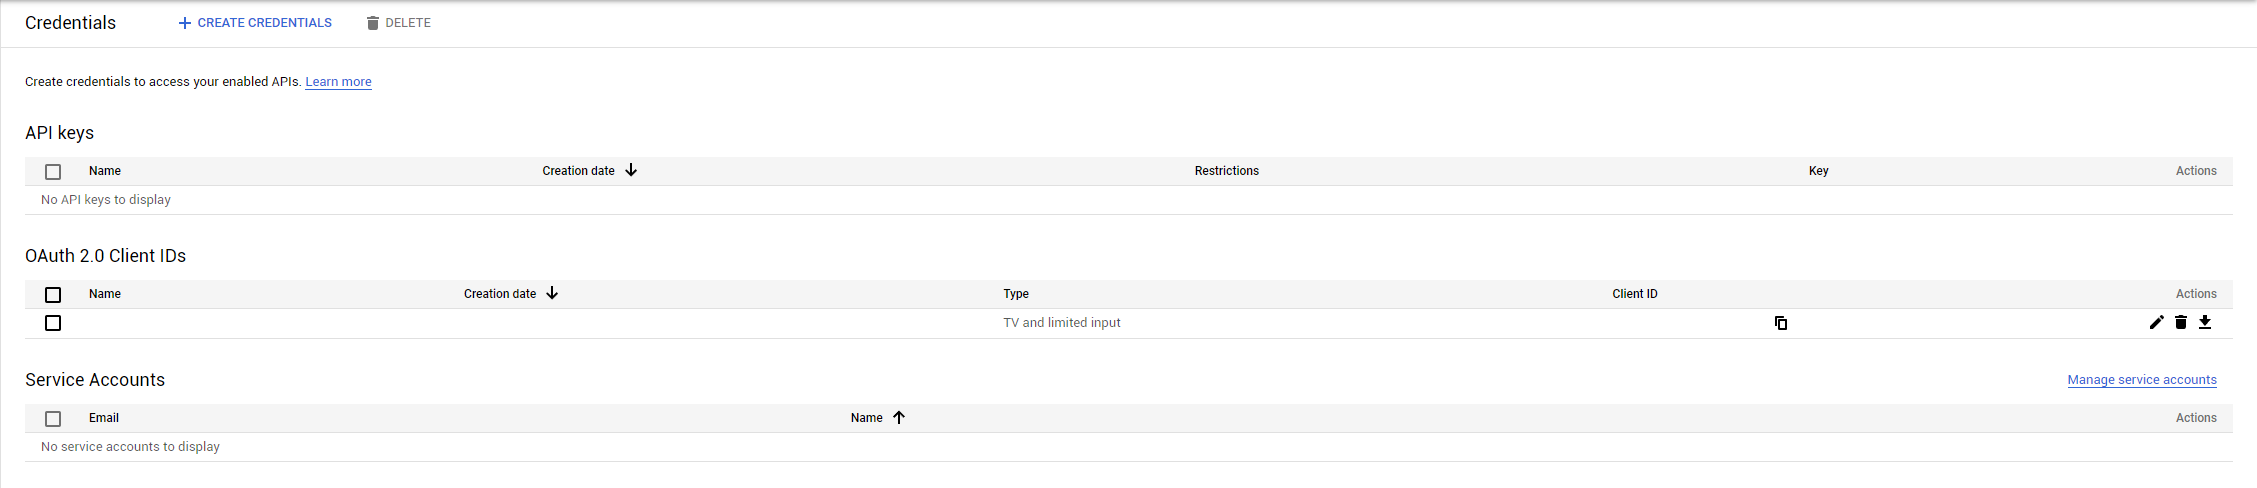
클라이언트 ID는 보통 apps.googleusercontent.com으로 끝나는 구조로 되어 있습니다.

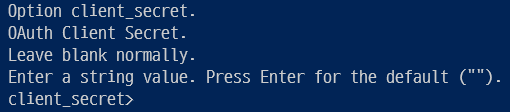
다음은 시크릿(Secret)을 입력하는 단계입니다.
Option client_secret.
OAuth Client Secret.
Leave blank normally.
Enter a string value. Press Enter for the default ("").
client_secret>
이 값은 Client ID 값 옆의 연필 모양 아이콘(Edit OAuth client)을 누르면 볼 수 있습니다.

공백 등이 포함되지 않았는지 확인한 후에 값을 입력하면 됩니다.
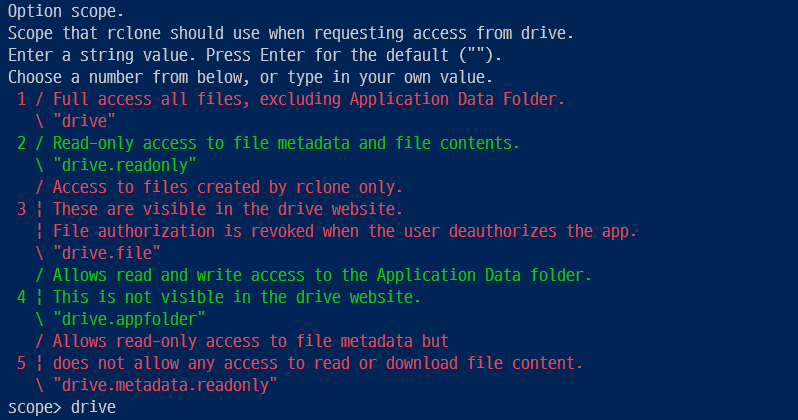
파일 접근 권한은 모든 파일에 접근할 수 있도록 설정합니다.
Option scope.
Scope that rclone should use when requesting access from drive.
Enter a string value. Press Enter for the default ("").
Choose a number from below, or type in your own value.
 1 / Full access all files, excluding Application Data Folder.
   \ "drive"
 2 / Read-only access to file metadata and file contents.
   \ "drive.readonly"
   / Access to files created by rclone only.
 3 | These are visible in the drive website.
   | File authorization is revoked when the user deauthorizes the app.
   \ "drive.file"
   / Allows read and write access to the Application Data folder.
 4 | This is not visible in the drive website.
   \ "drive.appfolder"
   / Allows read-only access to file metadata but
 5 | does not allow any access to read or download file content.
   \ "drive.metadata.readonly"
scope>
모든 파일에 대해서 접근 권한을 얻기 위해 drive를 입력합니다.
다음은 루트 폴더를 설정하는 내용인데 그냥 엔터를 눌러서 구글 드라이브의 루트를 사용합니다.
Option root_folder_id.
ID of the root folder.
Leave blank normally.
Fill in to access "Computers" folders (see docs), or for rclone to use
a non root folder as its starting point.
Enter a string value. Press Enter for the default ("").
root_folder_id>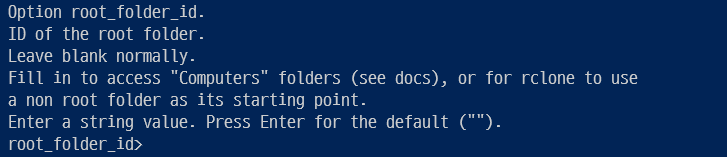
아무것도 입력하지 않고 엔터를 입력하면 됩니다.
다음은 Service Account Credentials JSON 설정으로 동일하게 바로 엔터를 눌러서 넘어가면 됩니다.
Option service_account_file.
Service Account Credentials JSON file path.
Leave blank normally.
Needed only if you want use SA instead of interactive login.
Leading `~` will be expanded in the file name as will environment variables such as `${RCLONE_CONFIG_DIR}`.
Enter a string value. Press Enter for the default ("").
service_account_file>
상세 설정은 n을 눌러서 스킵하면 됩니다.
Edit advanced config?
y) Yes
n) No (default)
y/n>
다음은 자동 설정 진행 여부입니다.
Use auto config?
 * Say Y if not sure
 * Say N if you are working on a remote or headless machine

y) Yes (default)
n) No
y/n>
일반적으로 SSH 연결 상태에서 작업을 진행하기 때문에 n을 입력합니다.

화면에 링크가 표시되는데 이 링크를 복사해서 웹 브라우저 주소창에 입력합니다.
Option config_verification_code.
Verification code
Go to this URL, authenticate then paste the code here.
https://accounts.google.com/o/oauth2/auth
Enter a string value. Press Enter for the default ("").
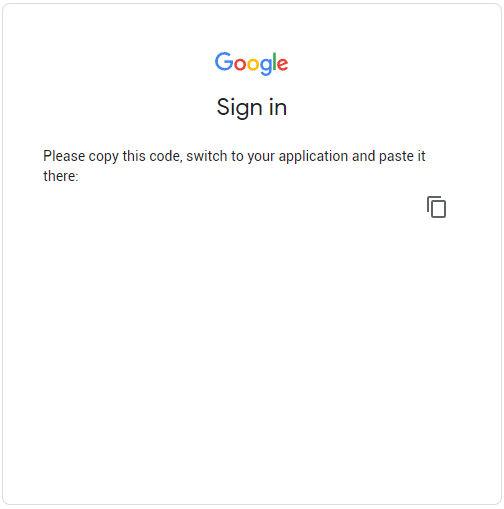
config_verification_code>권한을 요청하는 창이 표시되면 Allow를 클릭합니다.

다음으로 화면에 표시되는 코드를 복사해서 config_verification_code에 입력하면 됩니다.
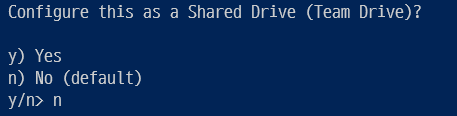
다음으로 팀 드라이브 설정 여부입니다.
Configure this as a Shared Drive (Team Drive)?

y) Yes
n) No (default)
y/n>
개인 드라이브를 연동하기 위해 n을 입력합니다.
모든 것이 제대로 입력되었으면 설정을 완료합니다.
y) Yes this is OK (default)
e) Edit this remote
d) Delete this remote
y/e/d>
여기서 y를 누르면 설정이 완료됩니다.

추가한 gdrive가 목록에 표시된 것을 확인할 수 있습니다.
Current remotes:

Name                 Type
====                 ====
gdrive               drive

e) Edit existing remote
n) New remote
d) Delete remote
r) Rename remote
c) Copy remote
s) Set configuration password
q) Quit config
e/n/d/r/c/s/q>
설정을 완료했으면 q를 입력해서 종료합니다.

이것으로 구글 드라이브 연동이 완료됩니다.
3. 드라이브 연동 확인
설정이 완료된 이후에 구글 드라이브가 /mnt/rclone_gdrive에 연동된 것이 확인 가능합니다.
파일의 수에 따라 연동 완료까지는 시간이 걸릴 수 있습니다.
cd /mnt/rclone_gdrive/편리하게 로컬 디렉토리처럼 구글 드라이브의 파일과 폴더들을 볼 수 있습니다.
로컬에 있는 파일을 구글 드라이브에 업로드하는 방법은 다음과 같습니다.
먼저 /data/rclone_gdrive/mergerfs에 디렉토리에 파일들을 추가합니다.
/data/rclone_gdrive/mergerfs/Document와 같이 추가하면 /mnt/rclone_gdrive에도 동일하게 보입니다.
스케줄러가 매 정각에 파일들을 구글 드라이브로 전송하고 로컬의 파일을 삭제합니다.
편리하게 로컬 파일들을 구글 드라이브로 이동할 수 있습니다.
이것으로 구글 드라이브를 rclone으로 연동하는 작업이 완료됩니다.
'IT > NAS' 카테고리의 다른 글
| [자작NAS] 우분투 서버에 Docker로 Joplin 설치 (1) | 2022.02.18 |
|---|---|
| [자작NAS] 우분투 서버에 Docker로 PostgreSQL 설치 (0) | 2022.02.14 |
| [자작NAS] 우분투 서버에 Docker로 rclone 설치 및 구글 드라이브 암호화 연동 (0) | 2021.12.14 |
| [자작NAS] 우분투 서버에 Docker로 Snapdrop 설치 (0) | 2021.05.11 |
| [자작NAS] 우분투 서버에 Docker로 Snipe-IT 설치 (4) | 2020.08.17 |


